Blue Apron Smoky Cheeseburgers and Elote Style Sweet Potatoes
Eating a whole pepper? We promise, you can handle it. Even thought they're made from whole peppers, jalapeño poppers are only mildly spicy. The tame spice level is thanks, in part, to cheese. Creamy ingredients are a delicious way to tone down the heat in jalapeño poppers.
Here, we use a filling of cream cheese and cheddar to create an at-home version of a a classic finger food. For even more cool factor, pair your poppers with a savory ranch dressing.

This recipe turns down the heat even more by removing the seeds and ribs from the jalapeños before cooking. Cut your peppers in half lengthwise, keeping the stem attached, and use a knife to cut away the ribs and scrape out the seeds. After you add the filling, you'll be able to stick the peppers back together.
Jalapeño poppers recipe
Makes: 12 poppers
Cook Time: 25-35 minutes
Ingredients
- 6 oz cream cheese, softened
- 2 oz sharp cheddar cheese, grated
- ¼ tsp onion powder
- ¼ tsp garlic powder
- ¼ tsp smoked paprika
- Your favorite hot sauce
- 6 three-inch-long jalapeño peppers, halved lengthwise, ribs and seeds removed
- ½ cup tempura batter
- ½ cup club soda
- ½ cup all-purpose flour
- 1 cup plain breadcrumbs
- 1 quart canola or vegetable oil
- Kosher salt
- Freshly cracked black pepper
Instructions:
Make the filling. In a medium bowl, thoroughly combine the cream cheese, cheddar cheese, onion powder, garlic powder, and smoked paprika. Stir in the hot sauce to taste. Season with salt and pepper to taste.
Stuff the peppers. Season the cavity of each halved pepper with salt and pepper. Spoon about 1 tablespoon of the filling into each seasoned cavity (it should fill the cavity and create a small, rounded mound).
Bread the peppers. In a bowl, combine the tempura batter and club soda; whisk until smooth. Place the flour and breadcrumbs on 2 separate plates. Working 1 piece at a time, thoroughly coat the stuffed peppers in the flour, then in the tempura batter mixture, then in the breadcrumbs (pressing to adhere). Transfer to a plate. Refrigerate for at least 20 minutes to set.
Fry the peppers. In a large, high-sided pan (or cast-iron skillet), heat ½ inch of the oil on medium-high until hot. Once hot enough that a pinch of flour sizzles immediately when added to the pan, working in batches, add the breaded peppers. Cook 45 seconds to 1 minute per side, or until golden brown. Transfer to a paper towel-lined plate and immediately season with salt. Let cool for 5 minutes before serving.
Jalapeño Popper Ranch Dipping Sauce
Makes: ½ cup dressing
Ingredients:
- ¼ cup crème fraîche or sour cream
- 2 tablespoons buttermilk
- 2 tablespoons mayonnaise
- ½ teaspoon garlic powder
- ½ teaspoon onion powder
- ½ teaspoon dried chives
- ¼ teaspoon dried parsley flakes
- ¼ teaspoon celery seeds
Instructions
Make the sauce. Combine all ingredients in a small bowl. Season with salt and pepper to taste.
Try these out next time you're hosting. These satisfying bites are would be a happy hour or a game day gathering.

Have you ever sprouted your own beans? You can, in fact, grow bean sprouts with only some seeds, some water, and a small container. You don't have to be a hippie, a health food fanatic, or a Californian to pull it off.
But, let's be honest, in some ways we are all Californians now. Maybe we're more hipster than hippie, but we've all embraced healthy, organic food. And, the next frontier, after the bulk aisle and the homemade kale chips, is sprouting.
Benefits of Sprouts
Sprouts have become popular for a reason. In our health food-obsessed culture, sprouts have a whole lot to offer. Seeds, beans, and many grains can all be sprouted, and, once they are, the sprouted seeds have up to 30 percent more protein than their un-sprouted counterparts. The vitamins in a sprout depend on the seed it is sprouted from, but almost all sprouts are potent sources of Vitamin C, Vitamin B, and iron. Sprouts are also full of phytonutrients (or phytochemicals), the many different organic compounds that help plants function and may also help our bodies function better. These include lycopene, beta-carotene, and chlorophyll along with many, many others. Increasing numbers of studies show phytonutrients serving as powerful antioxidants and anti-inflammatories and providing many other health benefits as well.

Although sprouts have recently enjoyed a resurgence in popularity in the U.S., they have played a vital role in the diets of many Asian cultures for years. In the U.S., interest in sprouts began during World War II, when Cornell nutrition professor Clive McCay published an article highlighting the nutritional benefits of soy bean sprouts. It began:
Wanted! A vegetable that will grow in any climate, will rival meat in nutritive value, will mature in 3 to 5 days, may be planted any day of the year, will require neither soil nor sunshine, will rival tomatoes in Vitamin C, will be free of waste in preparation.
Convincing, right? If you're looking to take advantage of these near-miraculous nutritional powerhouses, here's what you need to know.
Types of Sprouts
Let's start with how to buy sprouts—just in case you aren't receiving them handily pre-selected in your Blue Apron boxes. Sprouts may seem like a seasonal food, but, as McCay's wanted ad points out, they are not. Almost all sprouts are grown in greenhouses, making them a very practical and powerful source of all the good things fresh vegetables bring you—vitamins, fiber, and phytonutrients—year round.
When you shop for sprouts, you'll quickly notice that there are many kinds. Americans are most familiar with alfalfa sprouts and mung bean sprouts. Alfalfa sprouts are the tangle of green yarns that you often find on sandwiches; mung bean sprouts are the crunchy white stems that you often find cooked in Asian food. These days though you can also regularly find chickpea sprouts, lentil sprouts, and broccoli sprouts in stores. Research suggests that different sprout varieties offer different health benefits—broccoli and radish sprouts appear to be particularly high in antioxidants, for example. Different sprouts also have very different textures and tastes. If a pile of alfalfa sprouts has just never been your thing, crunchy chickpea sprouts may hold much more appeal. In other words, don't write them all off.
Whether you are growing sprouts in a jar in your kitchen or a sprout farmer is growing a crop for commercial use, the process begins the same way. First, seeds are soaked for about eight hours. After they soak, the seeds get stored in a humid, ventilated container in a relatively warm spot for about three days until they have sprouted. To prevent excessive heat build up or the growth of fungus, the seeds then have to be rinsed a few times every day.
I spoke with Barbara Sanderson from the International Sprout Growers Association who explained that this process, while fairly easy when it's taking place in a jar in your kitchen, is quite labor intensive for commercial farmers. Sprouts can also be an expensive crop, because they require more seeds to grow. A broccoli farmer might get a number of heads of broccoli from one seed, but a sprout farmer sells each seed once it has sprouted.
Sprouts have also posed some difficulties for farmers because their growing conditions can foster harmful bacteria. The warm and humid conditions in which sprouts grow can also foster the growth of e. coli and salmonella. Of course, all raw vegetables carry some of this risk. As with all vegetables, if you are worried about bacteria you might choose to cook your sprouts. If you are eating them raw, you should definitely make sure to buy the freshest possible sprouts and, as I'm sure goes without saying, avoid sprouts that seem to have become a bit slimy or smelly.
What about Microgreens?
Microgreens pack a lot of the same nutritional punch as sprouts, but have grown for a little longer, and are harvested without the seeds. In other words, sprouts germinate in water just long enough to develop a stem and roots. When they get to your plate, you eat the seed, the sprout, and the root. Microgreens, on the other hand, are actually planted in soil where they grow for seven to 14 days before their green shoots are harvested. Research suggests microgreens, like sprouts, contain far more vitamins and phytochemicals than fully matured vegetables.

How to Use Sprouts & Microgreens
Both sprouts and microgreens are easy additions to salads and sandwiches. Experimenting with cooking them is a great idea too. However, you use them they are a quick way to add crunch, color, fiber, vitamins, and those elusive phytochemicals to a meal.

Cauliflower rice is a beloved secret weapon for those looking for low-carb or low-calorie dinners. The neutral flavor of cauliflower makes it a perfect vessel for stir-fried vegetables or savory proteins.
Making your own cauliflower rice at home is an easy, money-saving option. You don't need any specialized equipment to do it. Sure, it's a little faster with a food processor, but our box grater method works just as well.
How to make cauliflower rice at home
Start with a head of cauliflower. Use a chef's knife to remove the exterior leaves. Cut the cauliflower into quarters, cutting through the core.
Using a food processor
To use a food processor, cut out and discard the core of the cauliflower.
Cut the body of the cauliflower into large pieces, just large enough so that all of the pieces will fit in the bowl of the food processor. Pulse until coarse crumbles form.
Using a box grater

If you don't have a food processor, don't stress.
Using the large side of a box grater, grate the quartered cauliflower onto a large plate. Grate until you reach the core, and then discard the core.
How to cook cauliflower rice
Cauliflower rice cooks quickly. Using this method to cook the cauliflower on its own will prevent overcooking it while you wait for proteins and sturdier vegetables to cook. Follow this technique, and then combine your cooked cauliflower rice with the other elements in your dish.
In a large pan (nonstick, if you have one), heat the 1 Tbsp of oil on medium-high until hot. Add the cauliflower rice in an even layer.
Cook, without stirring, 2 to 3 minutes, or until slightly softened.
Season with salt and pepper. Continue to cook, stirring occasionally, for 3 to 4 minutes, or until softened. Transfer to a bowl. Taste, then season with salt and pepper if desired. Cover with foil to keep warm. Wipe out the pan.
Recipes with cauliflower rice
Once you've riced your cauliflower, it's time for the fun part. These are some of our favorite recipes with cauliflower rice.
This hearty stir-fry brings together a savory mix of ground turkey, bok choy, and cremini mushrooms with an umami-rich duo of spicy sambal and our soy-miso sauce. It's all served on top of fluffy cauliflower rice.
This spin on a Chinese takeout favorite, swaps cauliflower rice for the white rice. Its tender texture complements a flavorful combination of pork, vegetables, and scrambled egg.
These lettuce cups are loaded with juicy pork and sweet peppers—seasoned with sesame oil and savory coconut aminos for punchy, satisfying flavor.
Find more recipes like these on the Blue Apron Cookbook.
If capers aren't already your secret weapon in the kitchen, they should be. If you know how to cook with capers, these tiny green buds will add a bright pop of briny flavor to whatever you're making. Think of them like a shortcut to flavor. These are some of the recipes that made us fall in love with capers.
What are capers?
Capers are small, unopened flower buds. They're harvested from the caper bush, or Flinder's rose, a flowering plant native to the Mediterranean. After harvesting, the bud is pickled and kept in either salt or a salt-vinegar mixture. During this process, the capers release mustard oil, giving them a distinct, savory flavor.
What do capers taste like?
Capers have a lot of the same brine and saltiness that you'd expect from an olive, but with brighter lemony and floral flavors. They are, after all, a flower bud.
How do you use capers?
Capers can be eaten raw, but they're most often incorporated into sauces or used as a flavorful topping for proteins.
Recipes with capers
This simple chicken dish gets a boost from a zesty a topping made with briny capers and garlic.
Piccata is a traditional Italian dish prepared with capers. This seared chicken dish is inspired by the classic and topped with a piccata-style sauce made from garlic, lemon juice, capers, and butter.
Capers are the perfect complement to bright, acidic tomatoes in this flavorful appetizer.
In this vibrant pasta dish, we're bringing together seared chicken and sweet peppers with a rich, creamy sauce, which gets deliciously varied flavors and textures from Calabrian chile paste, roasted red peppers, and briny capers.
Capers cooked in brown butter add a pop of flavor to this satisfying vegetarian dish made with roasted cauliflower, kale, and breadcrumbs.

with Roasted Shishito & Mushroom Farrotto
Traditional Italian risotto can only be made with Arborio rice. This short grain, starchy rice is what gives risotto its signature creamy texture. The thing is, sometimes it pays to break tradition. It might not be the exact same dish, but whole grains like farro can make a delicious creamy meal all their own. Here's how to make a risotto-style dish with farro. Learn these rules, and you can swap in almost any whole grain.
Know your grain
Whole grains like farro, barley, millet, teff, and quinoa can all be used for a creamy risotto style dish. Farro risotto is so beloved that it's been given its own name—farrotto. A version of farro risotto even made its way onto Blue Apron's menu in partnership with Chef Sam Kass.
Compared to arborio rice, farro is nuttier and a little chewier. When it comes to making risotto, farro is actually a little more forgiving. Arborio can develop a gummy texture if rushed, but farro tends to keep things nice and creamy. Farro is also packed with protein and fiber, making it a great choice for a healthy swap.
Pick your recipe
Even if you won't be following the instructions exactly, you can draw inspiration for farro risotto from any classic risotto recipe.
You can use traditional risotto recipes to get ideas for mix-ins, like spinach and parmesan, or toppings, like crispy brussels sprouts and goat cheese.
Prepare your farro
The grain cooking technique is the most important part of any risotto dish. The key is cooking slowly and incorporating liquid gradually throughout the cooking process.
Farro risotto is made by slowly incorporating liquid into farro as it cooks. The liquid can be broth, water, wine, or a combination. After each addition of liquid the grains should be cooked until the liquid is completely absorbed. Only then should more liquid be added. This slow cooking process encourages the grains to release their starches and create a creamy texture.
Prepare your other ingredients
One of the chief rules of making risotto, or a risotto-style dish, is not to rush. To develop a creamy finished dish, the grains have to be cooked slowly and gently.
This long cooking time creates a wonderfully rich base of grains, but it would destroy softer vegetables. If your dish calls for delicate vegetables, like tomato or zucchini, cook them separately and spoon them over the risotto before serving.
For an easy, healthy version of farrotto check out the Blue Apron x Chef Sam Kass menu.

Shishito peppers are small green peppers of Japanese origin. These peppers ripen from green to red, but they're typically harvested while still green.
These peppers have a very thin skin. Their delicate nature means that they will cook quickly compared to heartier varieties like bell peppers. They are often served lightly charred or blistered. This can be done in a pan or on the grill. Either way, it will take less than 10 minutes. After they're charred, they can be served as a snack with just a sprinkle of crunchy salt, or incorporated into a dish.
How to cook shishito peppers

Charring or blistering these small peppers is simple. All you need is a pan and a heat proof spoon or spatula.
In a large pan (nonstick, if you have one), heat a drizzle of olive oil on medium-high until hot. Add the peppers in an even layer. Cook, without stirring, 3 to 4 minutes, or until lightly browned; season with salt and pepper. Continue to cook, stirring occasionally, 4 to 5 minutes, or until charred and softened. Season to your liking and serve immediately.
Are shishito peppers spicy?
Most shishito peppers are not spicy. They're so mild that they can be eaten whole without causing any sweaty discomfort. However, for some reason, one in every 10-20 peppers has a bit of a kick. This surprising spice may be due to excessive sun exposure during growth. There's no reason to worry, even the spiciest shishito peppers aren't as hot as a jalapeño, and eating them is completely safe. The occasional hot pepper just makes eating these as a snack a little more exciting.
Can you eat shishito peppers raw?
Shishito peppers can be eaten raw, although it's more common to serve them charred or blistered. If eaten raw, they will have a slightly sweeter, fruiter taste.
Recipes with shishito peppers
Pair shishito peppers with crunchy green beans for a healthy green side dish.
Top charred peppers with fragrant lime salt for extra fruity flavor.
Roasted peppers add flavor and texture to this Mexican-inspired grain bowl.
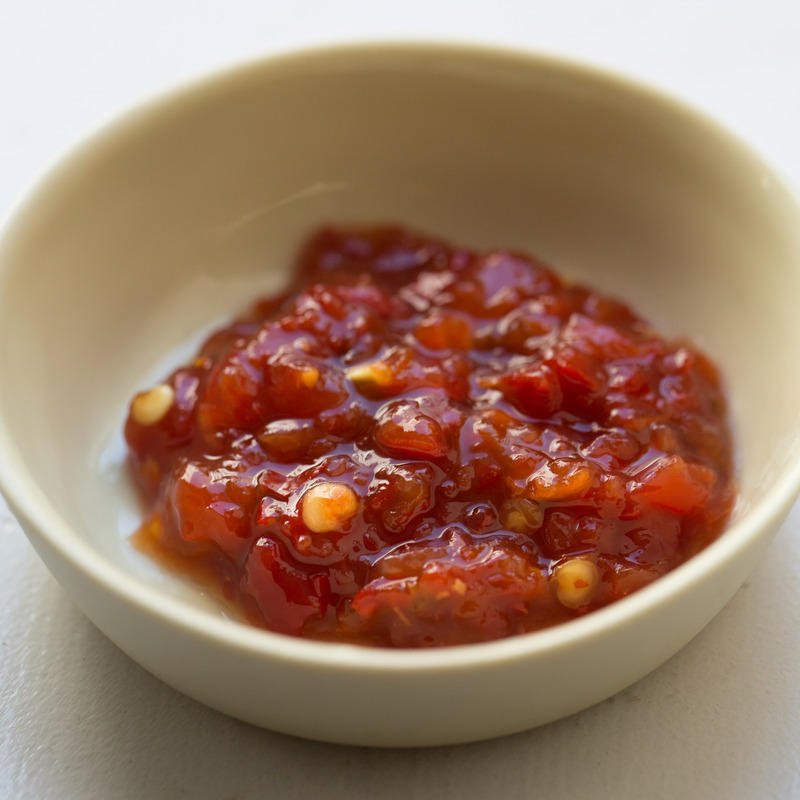
What is sambal oelek
Sambal oelek is an Indonesian condiment made from chili peppers, vinegar, and salt. It's name comes from the Indonesian word for pepper—sambal—and the name for a mortar and pestle in which peppers are sometimes ground.
Sambal oelek, sometimes just called sambal, is thicker and chunkier than most American hot sauces. It usually contains bits of pepper and whole pepper seeds. The flavor is bright and tart from the vinegar, with a good amount of spice. A little goes a long way!
How to use sambal oelek
Sambal is an all-purpose condiment. It can be used as part of a marinade, added during the cooking process, or spooned on as a finishing touch.
The spice level will vary depending on when in the cooking process it's added. The earlier it's introduced, the more mellow the spice will be, and the more sambal you can use. If you're incorporating it into a marinade, you'll be safe with a few heaping tablespoons. If you're using it as a topping, start with a scant teaspoon.
Sambal can be used in beef, fish, chicken, and vegetable dishes. At Blue Apron, we especially love it in stir-frys.
Recipes with sambal oelek
Sambal oelek is used to flavor the turkey and the dipping sauce in these Sesame-Sambal Turkey Lettuce Cups.
This spicy chicken & rice recipe uses sambal to create a sweet and spicy glaze for tender chicken and vegetables.
Try a wholesome take on fried rice that substitutes protein-rich quinoa for rice. Adding sambal oelek to the pan with the chicken adds depth and spice to this healthy dinner.
Top seared chicken with a sauce made from sambal and coconut milk. The creamy coconut milk will help tone down the heat of the spicy sauce.
These chicken tacos are inspired by Asian-flavors. They're full of crunchy slaw, and topped off with a spicy crema spiked with sambal oelek.
Here, spicy sambal and creamy mayo come together to give rich, Asian-style flavor to the plant-based Beyond Burger.
Find more recipes featuring sambal in our cookbook.

What is non-dairy cheese?
Non-dairy cheese is a vegan and lactose-free alternative to traditional cheeses. Non-dairy cheese can be made with soy milk, nuts, nutritional yeast, or a combination of other ingredients. Lactose-free cooks can now customize some Blue Apron dinners with Daiya non-dairy cheeze.
Can I call it cheese?
Technically, no. The FDA enforces standards for the definition of cheese. These standards are complicated, and regulate everything from fat content, to milk type, to moisture content for 72 different types of cheese and cheese products. That's why you may see some non-dairy cheese using phrases like "cheeze" or "mozzarella-style."

How can I cook with dairy-free cheese?
Non-dairy cheeze is a great tool for reducing dairy consumption, lactose-free lifestyles, or for vegan cooking. Try swapping Daiya, or another diary-free cheese into a new recipe.
For better melting, try grating non-dairy cheese instead of slicing
The Daiya cheeze sticks grate very easily. Using a box grater or microplane, grate the sticks at a downward angle starting from one end, keeping your fingers tucked away as you grate to the other end of the stick!
Know what to expect
Daiya non-dairy cheeze melts well onto vegetables and protein, but it may not stick as well to proteins as a traditional dairy cheese would.

Put a lid on it
For best results, use steam from the cooking process to help melt your non-dairy cheeze. While your food is cooking, just cover the pan with a lid or a sheet of aluminum foil. This traps heat and ensures things get nice and melty.
Choose your recipe wisely
We love using Daiya cheeze sticks as a replacement for medium-hard cheeses like cheddar or mozzarella, as opposed to soft cheeses like brie and chevre. We prefer melting or baking Daiya over serving it raw. This non-dairy cheeze is great on burgers, sandwiches, skillets, quesadillas and more! 🙂
Look for Daiya cheeze, available as a customization, on the Blue Apron menu

What is Buffalo sauce?
When it comes down to it, Buffalo sauce is just a type of hot sauce. Buffalo flavor gets its signature tart and tangy spice from a vinegar-base and a mixture of spices including cayenne and a hint of garlic. Most Buffalo wing recipes call for mixing the hot sauce with melted butter to balance out the acidic vinegar and add rich flavor.
Why is it called Buffalo sauce?
All due respect to the American buffalo, but this sauce is actually named in honor of the city in New York. Most stories about the origin of this tangy condiment point to Anchor bar in Buffalo, NY. Anchor bar has been open in Buffalo since 1935, and is still serving up Buffalo wings today.
How do I make Buffalo sauce at home?
The easiest way to make a Buffalo-flavored dish at home is by starting with a bottled Buffalo-style hot sauce. Frank's Red Hot is the old-school favorite. It's available in grocery stores across the U.S.
How hot is Buffalo sauce?
There are dozens of varieties of Buffalo sauce available in supermarkets. The classic Frank's Red Hot Buffalo sauce is only mildly spicy, but you can find hotter options. If you're not a fan of heat, you can turn down the spice by adding more melted butter into the mix.
Buffalo sauce recipes
Chicken wings are the nostalgic favorite, but Buffalo flavor can do a lot more. These are some of our favorite ways to create a hot sauce-slathered dinner.
Buffalo-Style Chicken Drumsticks with Blue Cheese Sauce & Celery-Apple Salad
For a game day party or a casual dinner, you can't go wrong with this iconic snack.
Buffalo Cauliflower Sandwiches with Butter Lettuce & Pecan Salad
For dinner tonight, hearty hot sauce-spiked cauliflower stars in a vegetarian spin on a Buffalo-style sandwich.

Buffalo Cauliflower Pizza with Caesar Salad
Toss roasted cauliflower with buttery hot sauce mixture to make a delicious topping for flatbread.

Buffalo Chicken Meatballs with Creamy Mashed Potatoes & Carrot-Celery Salad
For an easy spin on classic buffalo chicken, we're recreating all the zesty, saucy flavors of the dish in these irresistible meatballs.

Stir-fry will always be there for you. If your goal is to cook slightly more, knowing your way around a stir-fry is a great place to start. This versatile dinner can be made with an infinite combination of ingredients. You don't even need to start with rice. Stir-fries can be built on noodles, rice, or other grains. Here's how to master making a stir-fry out of whatever you have on hand.

with Spicy Sesame-Peanut Sauce
What is stir-frying?
Stir-frying is a high-heat cooking technique, similar to sauteing. Traditionally, a stir-fry is made in a wok with a small amount of oil. The meat and vegetables are tossed and stirred until they are cooked.
Stir-frying in a Wok
If you have one, a wok is an excellent tool for stir-frying. The high, sloping walls are designed so that food can be tossed vigorously without flying out of the pan. The walls also make it easier to cook multiple foods at once. Once an ingredient has finished cooking, it can be push up to walls and kept warm while another ingredient cooks in the center.
Steps for making a good stir-fry
Set up your station
Stir-fries cook VERY quickly. You'll want to have everything prepped and ready so you can focus on the cooking once you start. Gather all of your utensils and chop everything into a bite-sized piece. It will cook faster and make for a better eating experience.
Don't add too much to the wok or skillet at once
If you overcrowd the pan, the moisture from the vegetables will cause the stir-fry to steam rather than fry or saute.
Add foods to the pan according to cook time
For example, don't put broccoli in the pan at the same time as a snow pea. By the time the broccoli is cooked through, the snow pea will turn to mush. The heartier the produce, the longer it will take to cook. You can add things together that have the same cooking time.
Best oil for a stir-fry
Use oil with a high smoke point. You want to cook with high-heat, so choose an oil that can complement that. Canola oil, peanut oil (though that potentially introduces an allergen) or grapeseed oil are all good options. Olive oil has a low smoke point, and isn't the best choice for a stir-fry.
How to make any kind of stir-fry
Use this template as a handy guide.
Add meat first
- As the meat caramelizes, it will build 'fond' in the pan that will flavor the rest of the dish. Set the meat aside while you cook the rest of the ingredients.
Cook vegetables next, as these usually take the longest.
- Start with heartier vegetables like carrots or broccoli.
- Lighter vegetables, like spinach, cabbage, or even bean sprouts, can be thrown in at the end to soften and wilt.
- Don't forget abut aromatics! Garlic, ginger and scallions should be added with the vegetables.
Mix in your eggs
- If you're including scrambled eggs, take the vegetables out of the pan and pour in the beaten eggs to quickly scramble them. If you're working with a wok, you may be able to just move the vegetables to the side of the pan instead of taking them out completely
Cooked rice or noodles & sauce
- Rice, noodles, or any other starches should be precooked. When you're stirring everything together at this point, it's just to quickly heat through.
- The sauce will thicken as it cooks, so don't leave it on too long, unless you're looking to thicken it up.
- If you want to crisp up the rice or noodles, add the sauce after. If you want to prevent sticking, add the sauce at the same time to help it all evenly coat.
For more easy, healthy weeknight dinners, check out Blue Apron's limited-time menu from chef Sam Kass.

Pickling extra vegetables is a delicious way to preserve string beans, cucumbers, peppers, cauliflower, turnips, or any leftover produce that you have lying around. It's much, much easier to make great quick pickles at home than you'd ever imagine. Plus, once you've turned your vegetables into pickles, they'll keep for at least a few weeks in the fridge. You can use them as condiments for your sliders or sloppy joes, or add them to salads for extra freshness and punch.
Quick pickles are one of our favorite ways to add zing and personality to recipes. Homemade pickles can be a great healthy snack, and pickling is an easy way to preserve extra vegetables. The salinity and acid in pickle brine helps vegetables stay fresh. Quick pickles will keep in your fridge for up to a week.
How to make quick pickles with any vegetable at home
Ingredients
- 4 cloves garlic
- 1 Tbsps black peppercorns
- 2-3 bay leaves
- ¼ C sugar
- ¼ C kosher salt
- 1 C white wine vinegar
- 4 C water
1. Peel the garlic cloves and roughly crush them with the flat side of a knife or the bottom of a jar.
2. Add all ingredients to a medium pan (nonstick if you have one), and bring to a boil over medium heat.
3. Let the mixture boil until it has reduced by about one third of its total volume. While the mixture cooks, prepare your vegetables.
4. Wash and trim your vegetables. We recommend cutting them into bite-sized pieces. Arrange the cleaned vegetables in glass jars.
5. Once it has reduced, carefully pour the still hot liquid into the glass jars with the vegetables. Pour enough liquid to cover the vegetables. Allow to cool to room temperature, then place in the fridge.
6. Pickles will be ready to eat once they're room temperature, but the flavor will improve overnight.
Read more about Blue Apron's favorite pickles here.

Fresh salsa is versatile, delicious, and easy to make at home. A classic pico de gallo is simply a well-season combination of tomatoes, onion, herbs, jalapeño, and lime juice. From there, it's infinitely customizable. Try adding fresh or grilled corn, charred tomatillos, or even a cut up fruit, like mango. There are no hard and fast rules when it comes to homemade salsa, but there are a few tips and tricks you can follow for the best results.
How to make a fresh salsa
Choose the best tomatoes for salsa
Fresh salsa calls for a firm tomato that will retain some structure even when it's thrown in the mix with salt and acidic lime juice. Look for a hearty varietal like Roma or beefsteak. Delicate heirloom tomatoes may end up a little mushy in a salsa. Cherry or grape tomatoes, even though they have a great flavor, will be difficult to cut evenly.
Aim for even cuts
The perfect bite of salsa should have a little bit of everything. When chopping, aim for small, even cuts. That way you won't end up accidentally biting into a large chunk of onion or an entire jalapeño.

Control your spice level
When you make your own salsa, the spice level is up to you. For a salsa with a kick, finely dice and add a whole jalapeño. For a more mild spice, use a knife to remove the seeds and ribs from any spicy peppers before finely dicing and incorporating.
Avoid watery salsa
Everyone loves a juicy tomato, but no one wants a watery salsa. After dicing your tomatoes, sprinkle them with salt, transfer them to a colander, and allow them to rest for 15-30 minutes. The salt will draw excess moisture out of the tomatoes, and the colander will allow it to run off. This step also ensures thoroughly seasoned tomatoes.
Give it time
After everything is combined, let the salsa sit together for at least a few hours before serving. This will give the flavors time to meld and mature. Pico de gallo will keep for up to 3 days in a tightly sealed container in the refrigerator.
Basic Easy Pico De Gallo Recipe
Ingredients
- 8ish Roma tomatoes
- 1 Jalapeno pepper, or pepper of your preference
- ½ Cup chopped herbs, like cilantro, or a mixture of cilantro and parsley
- Juice from one lime
- Salt
Other ingredient ideas:
- Peach
- Tomatillo
- Corn kernels
- Scallions
Instructions
Medium-dice the Roma tomatoes and toss with a generous teaspoon of salt. Transfer to a colander, and allow them to drain for 15-30 minutes.
While the tomatoes rest, finely chop the remaining ingredients and juice the lime. Stir to combine all ingredients in a large bowl, and taste for seasoning. Add more salt or lime if desired. Allow your homemade salsa to rest in the fridge for at least one hour before serving.
dominguezwitchany82.blogspot.com
Source: https://blog.blueapron.com/tag/vegetables/page/3/
0 Response to "Blue Apron Smoky Cheeseburgers and Elote Style Sweet Potatoes"
Postar um comentário